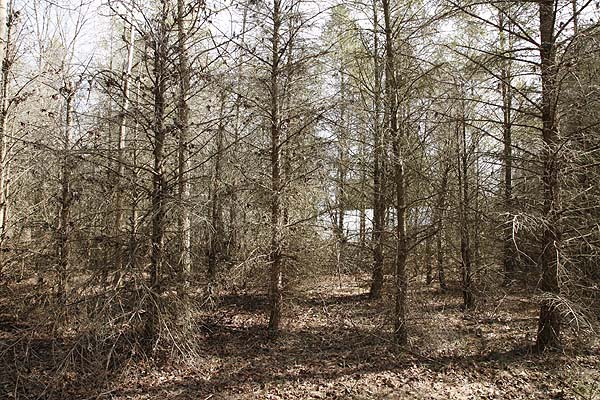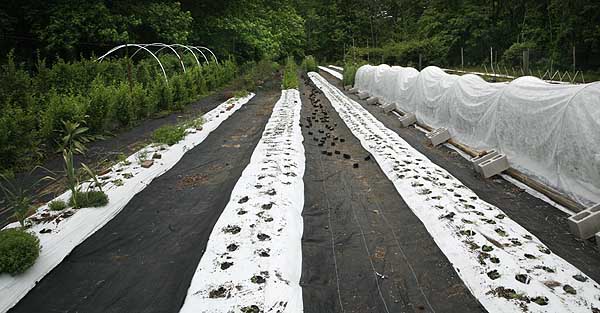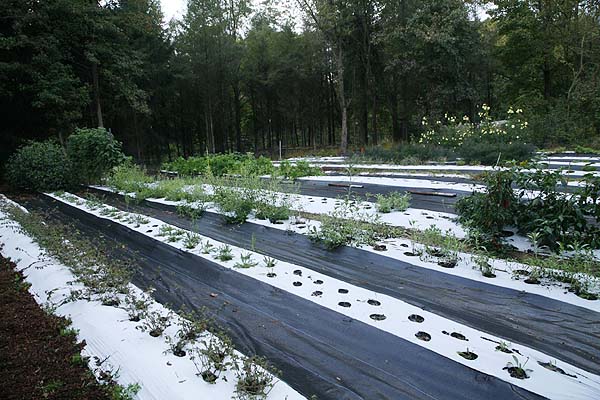
This year we turned this

Into this.

Completed field with crop rows.

And helped to decrease the carbon footprint just a little bit.

But it was a heck of a lot of work!
More than we had anticipated when we started. It was not something we really wanted to do but the trees that the previous owner had planted were dead and lots of dead trees are a hazard. I was constantly afraid that a lightening strike would ignite them and burn the whole darn forest area down.
So they had to go.

The trees had been originally planted as an attempt at a Christmas tree farm. It would have been fine if the trees had been looked after, pruned and thinned, but they were planted then totally ignored. The result was a lot of trees with trunks anywhere from 6 to 10 inches in diameter and up to 30 feet tall, but growing about three feet apart! Its no wonder the poor things died off. We knew quite a few were dead when we bought the farm but its hard to estimate just how many when you cant walk between the trees. Which as you can see was impossible due to all the dead lower branches.
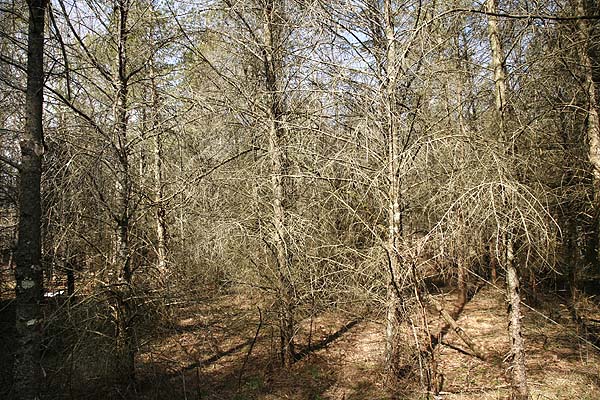
Dead standing trees. A fire hazard and impossible to walk between due to all the low dead branches.

Then Hurricane Sandy came along and took quite a lot of the dead ones down. We had two rows of them totally collapse, but these had been planted between several rows of white pine (who uses white pine as a Christmas tree?). these poor things were totally shaded by the much larger white pines and had all died. Sandy just flattened the whole lot. Taking those out was easy we just had to drag them away and clean up the area. Cant plant anything there because of all the white pines surrounding it but it makes a nice storage space.

This other area had several trees come down in the hurricane but a lot were still up or half down hanging on those that were down. It was a total mess. There were also a few living trees still struggling there but those were not in good shape either. They were all mostly dead with just a few little fluffy green branches on the top of a 30 foot tree. These were not exactly helping to negate the greenhouse gases so planting something more productive and more CO2 absorbing was desirable.
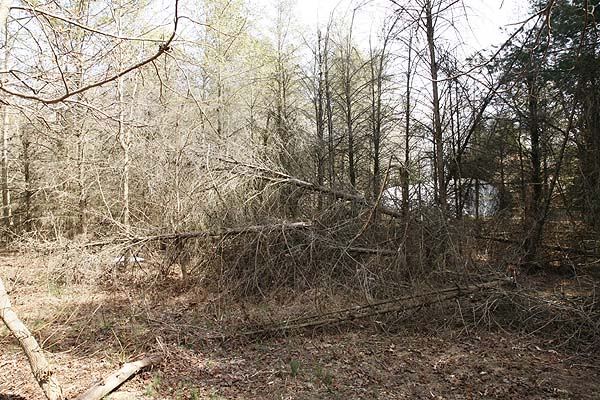
Many trees had fallen during Hurricane Sandy and several winter storms.

The problem was that the job looked a lot smaller when you cant see through all the dead and down trees and cant exactly figure out how many trees you have to deal with. The only thing to do is start at one end and work your way through it.
So that is what we did. Out with the chain saw and get cutting, and cutting and cutting. The more we cut down, or cut up with the large downed trees that were blocking the area, the more dead trees we found. The small area we thought we were clearing turned out to be a bit larger with a lot more trees on it that we had expected.
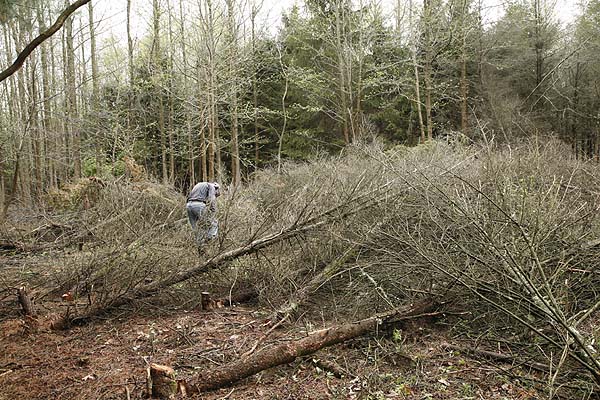
Cutting down the dead trees with chain saw

Cutting down the dead trees with chain saw

The good thing was since a lot of the trees were dead dragging them around out of the way of the next work area was not too hard. So that is how we worked. Hubby on the chain saw and me dragging the trees, and taking the photos (hence no photos or me). Some trees were too heavy for me to drag and the largest ones we had to cut into pieces. Some of the trunks were large enough to put aside and hopefully find a different project to use them in. This part took a long time. Cutting down trees is pretty fast but dragging them clear is hard work and very time consuming.
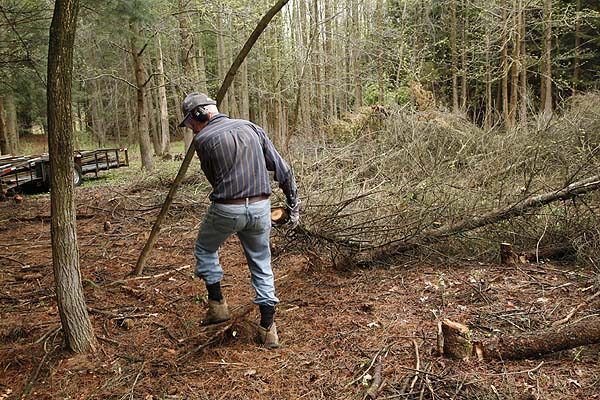
Dragging the downed trees out of the work area.

Once the trees were all down, we hired a chipper and spent the weekend dragging them over and chipping them up. Dragging all the trees to the chipper was a monumental task and certainly gives you a workout. However it’s a pretty satisfying feeling to drag a tree over to that machine and watch it eat it up and spit out a lot of useful chips. Our chip pile grew to about 9 feet tall and 16 feet across. Wood chips have a lot of great uses on the farm for the most part I use them in the aisles between the crop rows to keep the soil protected and stop moisture loss and erosion but they have lots of other uses too.
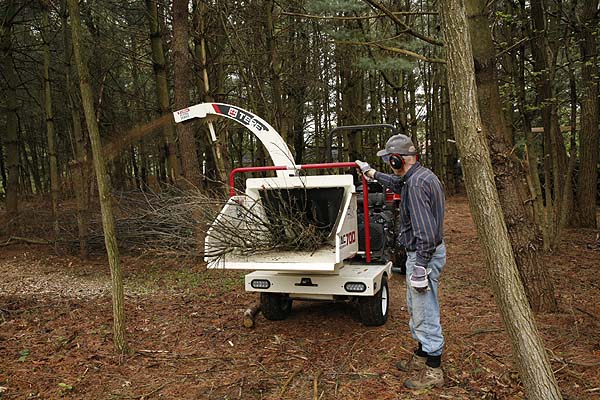
Chipping up the trees to make useful woodchips.

Now these kind of balsam fir trees are VERY messy, they drop all kinds of little branches and bits of twig, even the live ones are messy. So the ground was covered with a couple of inches at least of little twigs, bits of branch and all kinds of other junk. That had to be raked up and removed. If we left it and ploughed it in the bacteria would love it but it would suck all the nitrogen out of the soil and any crop we planted would fail.
This task fell to me. It took me two weeks going out every day that the weather was good enough, raking and barrowing the frass out of the way. I thought the job would never end, and its not one I would choose to repeat.
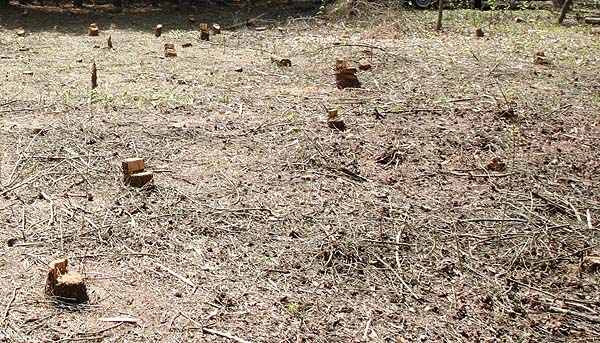
Twigs and other mess left after the main clearing is completed.

Once it was finally completed I went out and marked all the tree stumps. When I counted them up we had 117! That’s a lot of darn trees!
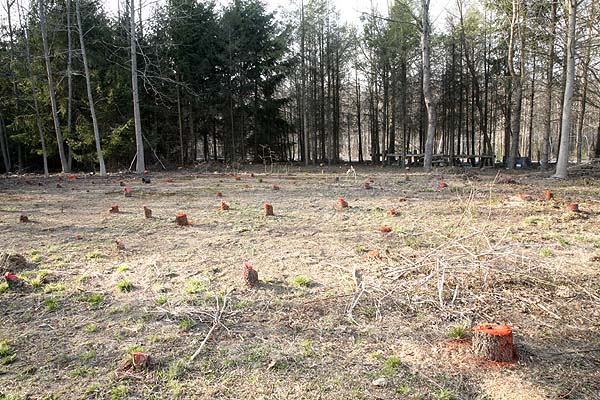
Cleared area with tree stumps marked all 117 of them.

We hired a guy to come in with a backhoe and dig out the stumps for us. He was delighted to do it and Hubby stood and salivated over the machine. Yes I know he wants one but they are pretty expensive.

The guy was very helpful and moved all the stumps to one side out of the area we had designated as a field before he left. However the cleared area was all rutted and a total mess, not suitable in that state for planting. We had to get our little tractor out and plough and flatten the area for many hours before it was in any shape to consider being called a field. The final flattening and leveling had to be done by hand with rakes. Fortunately we had help with that but it took a whole weekend of moving soil before I was happy with it.
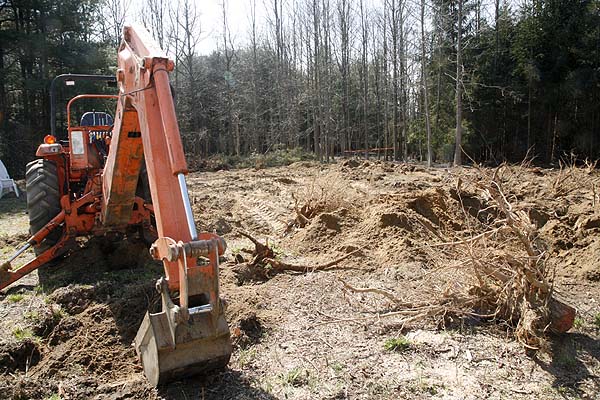
The backhoe and some of the stumps that were removed. The field in a rutted mess now.

Once that was done we had to measure it and figure out the spacing of the rows that we wanted to put in. We used string to show where the rows would go. Then it was compost moving time.
Our soil is sandy loam, its not particularly rich and has almost no organic material in it at all. This area which had had these trees on it most likely for about 20 years was going to be in very poor shape. So we knew we had to load it up with compost.

We buy mushroom compost by the truckload. We are fortunate to be relatively close to the Pennsylvania mushroom farms so a truckload of organic compost is not as costly as it would be elsewhere. Like everything if you buy in bulk it costs less. We had a truckload delivered but then we had to get it from the drop spot to the field. That meant manual labor. We had to dig it out of the pile, put it in our cart and drive it to the field, drop it on the row. Then repeat, and repeat and repeat. We hired help for this job. A lovely young women who was only too delighted to come shovel heavy compost. It was still several days work to get sufficient compost to the rows as I wanted a much higher amount in this new field than we use in our other fields since it was a first time around. We put compost only on the areas of the rows not in the aisles as this would have been a waste of compost and it increases the no till aspect of the farm. This is a method we have been using for years but is now being widely acknowledged as a more efficient method of farming.

Once the compost was in place it was rototilled in, then rows were shaped by hand using a rake to ensure they were exactly where we wanted them.
After that is was just a matter of adding the drip irrigation tape to each row and covering it with plastic mulch. We have found this essential for our soil type. The sandy soil does not hold water very well if left uncovered, plus its so fine that it will blow away in the wind. So the mulch ensures that the moisture says near the plant and the soil is protected.
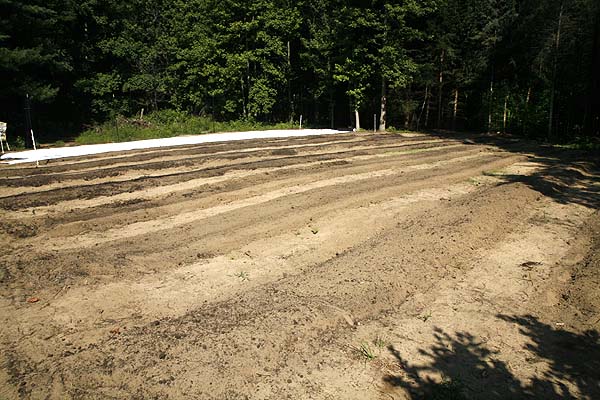
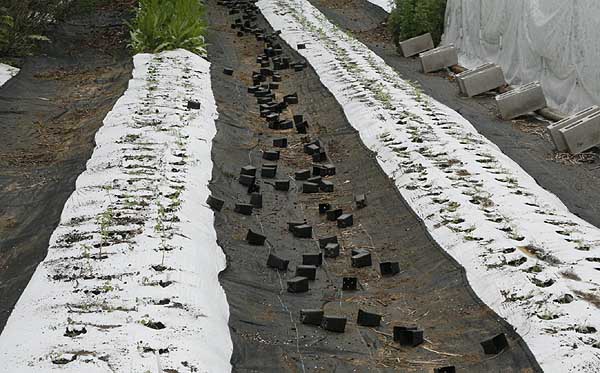
Row preparation. The far row already has white mulch applied. The next rows have their drip tape and all have been rototilled.

We also use ground cover fabric between the rows to keep the soil covered and prevent erosion. This is where the wood chips come in. They get spread over the aisles before the ground cover goes down. This helps protect the soil and keeps it more moist, plus it fills in any holes and makes the aisle flatter and thus easier and safer to walk on.

With so much work required the field was not completed until mid way through the summer so a lot of the plants went in far later than I would have liked. We had underestimated just how large the task was and how much time it was going to take us to complete. But all the plants thrived and the field is doing wonderfully as you can see from our final photo which was taken in late September. Its year one so many of the plants are still small but they all survived even though they got transplanted late. The row in the foreground has already been harvested as have a couple in the center. Those wonderful yellow flowers in the background are part of our Hibiscus manihot row and as you can see the giant flowers are visible all the way across the field. I love this plant.

Completed field with crop rows.

But the field is not finished. Right from the beginning we had decided to put our new production greenhouse on the first four rows of the field. That’s the four in the foreground. Hence the importance of making sure the field was flat and level. As you can see the greenhouse is not there yet. That project was not completed until the beginning of December, but that is story for another day.

So it’s been a busy year!

Showers And Thunderstorms Are Great Planting Weather.

So was memorial day weekend.

The problem with farm work is that it has its own timetable and it does not care about weekends or holidays. Spring is a very important time to get all the plants in the ground so they can get growing and flourishing. Memorial day weekend and other holidays often does not exist for farmers its too busy a time especially in the spring and the fall when there is so much to do.
For most people in the North eastern United state memorial day weather probably sucked, this past weekend was not that great either if you want to hang in the great outdoors. Memorial day weekend it was cool cloudy and rained a lot. Saturday night into Sunday we got nearly three inches of rain! It rained quite a bit on Sunday morning and then light rain for most of the rest of the day.
Perfect weather for planting. – at least on our soil.
When the heavy rain was over we were outside and hard at work. Our seedlings get transplanted into their own individual pots and grown on then planted in the ground as soon as we can. Cloudy days are perfect since it allows the plants to get acclimatized to their new surrounding without being blasted by hot sunshine.
We first cover or permanent beds with black/white plastic mulch. This keeps the weeds down and keeps the soil most and stops erosion. It also helps to keep down any soil borne problems from splashing on the plants. We put ours down by hand since our rows are too close together to use a bed forming machine. We use every inch of space we have since we don’t have a huge farm.

All the little plants have been transplanted to their new homes.

Then we have to hand punch the plastic and plant the plant. Memorial Day weekend was just the two of us, no one else wanted to miss their weekend even if the weather was not great. So hubby did the plastic replacement and I put the plants in. We replaced the plastic on all to-be-planted rows in one of our fields and got as many plants in the ground as possible. That was just under 700 plants! That’s only part of the planting there is a lot more to do yet.
This past weekend was a little different. Its put in plants until it rains so hard that you have to run for shelter. Then hang out in the hoop house which is the closest shelter we have. Oh and while we are there lets pull some weeds out of the pots in here too shall we. Then when the rain goes over its back out and more planting. Its not cold so the rain is not a bother and it really waters in the little plants.

It gets you in the back and the legs since its all bending over, but the weather was great. Sorry if others don’t think so but there are some people who do like cloudy and rainy weather. The plants certainly do. Just look at your lawn bet that growing tall and fast.

TODAY I PRETENDED I WAS A BEE!

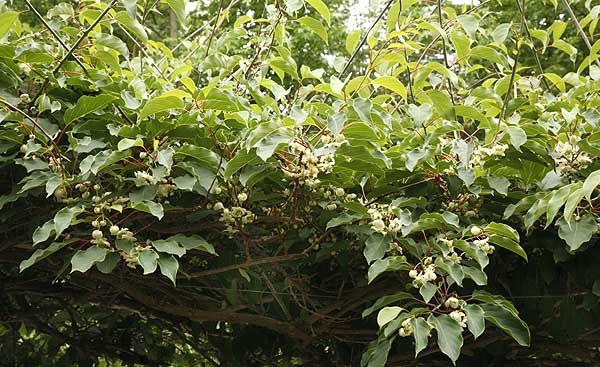
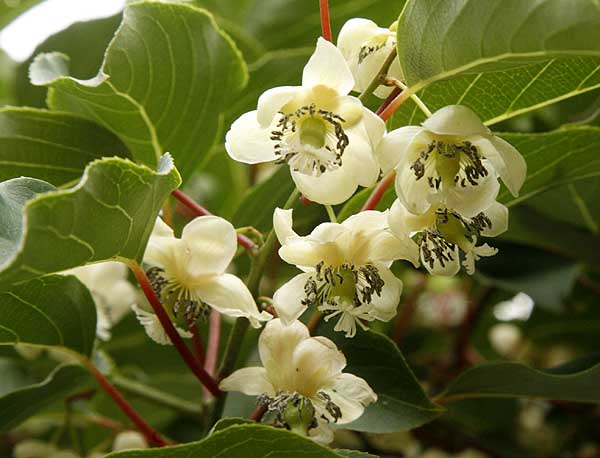
We have hardy kiwi vines. A whole row of them. Now its time for them to flower. When in bloom they look magnificent totally festooned with flowers and the scent is intoxicating.
There is just one problem

We don’t have any male vines!

When we put in the row I purchased two females and one male. We put them in, marked which was which and watched them grow. I pruned them and waited for them to flower. That takes three years at least from planting.
Ours took five years because the frost hit them the first two and killed all the flowers off.
Next year they bloomed wonderfully and we were delighted. Then sad since we got no fruit.
Next year I looked more closely at the flowers when they arrived and discovered to my horror that we had all females! The idiot who sold us the vines (who will remain nameless) sold us all females NOT a male.

It was too late to order males for that year but they went in the ground first thing the next spring. The trouble is they will take three years to flower too. We had already waited six years with no fruit now we had to wait another three!
This really sucked.
Then I attended a session on hardy kiwis at a farm conference and the speaker told us that you could buy male kiwi pollen! Wonderful. It’s not at all cheap, which is no surprise but you can get it. So we bought some pollen.

kiwi_flowersThen I had to go out and pollinate all the flowers by hand.
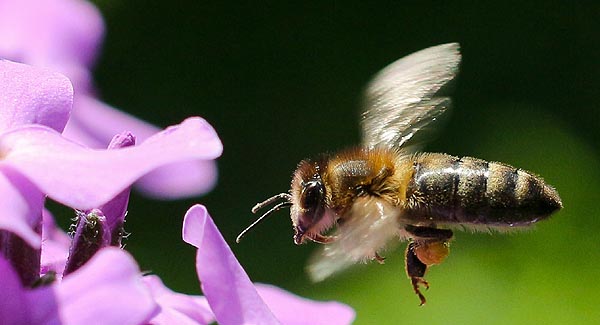
So for two days I was the bee. Armed with a little bottle of pollen on a strap around my neck and a paint brush I painstakingly worked my way up the row of vines trying to pollinate as many of the hundreds and hundreds of flowers that I could.
It really makes you appreciate bees after a day pretending to be one.

The really sad thing was that in the whole time I was working on the vines I saw only two bees. One bumble bee and one honey bee. I hope it was from my hive it was so fat with female pollen from the vines it could hardly fly. But it never brought its buddies back to reap the harvest. I have no idea where my bees are going but they are not working my field this year. There were no native bees, and no bumble bees. These all got devastated by a neighboring farmer in the last couple of years when they insist on spraying those toxic chemicals that kill all the insects good and bad. This killed off the large populations of pollinators that we had so carefully encouraged and cultivated on our farm.
So the really sad thing is that even if we had had male vines we would have had no fruit without me because there are no bees to pollinate them

There are a number of vegetables farms around us and they must all be having the same problem. No bees so fruits no peppers, peas, beans no anything much except salad greens.
Save the bees and save our food.

THWARTING VOLES!

Last year we put up a new hoop house, it’s mostly to protect all the trees we still have in pots from the winter freeze but I decided we had enough space to try growing some early vegetables. So back in early February we moved some pots around, cleared an area added some compost and planted some peas and fava beans. Watered in and went off to a couple of farm conferences.
When we came back about 10 days later I was expecting the seeds to be up. The weather had been pretty much OK and the temperatures inside the hoop house would have risen quite a bit. The willows and hazelnut trees in there were flowering nicely.
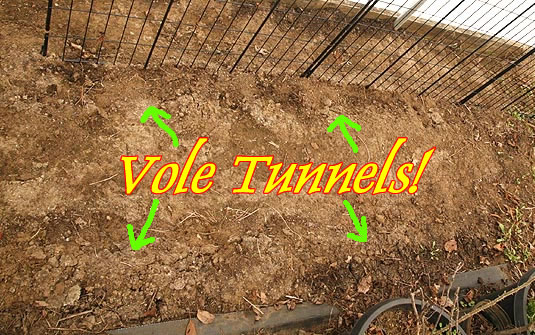
When I went to look I was disappointed. There were no sprouts. What there was however was a vole tunnel. You could see where the little bugger had burrowed all the way along the pea row. There were in fact a couple of pea sprouts on the ground. Just the green tops, the vole had eaten the pea seed out and left the green bit.
The tunnel reached the end of the pea row, then doubled back right down the bean row. Everything was gone!

To say I was PO’ed would be putting it mildly. I was looking forward to those early peas. Course they would not be quite as early as I had hoped since the temperatures in the last 10 days have plummeted and we had 10″ of snow last week which is still hanging around on the ground in large clumps. Today we are expecting another 5″ with 7-12″ forecast for tomorrow.
Lovely.

But I refused to be beaten by a damn rodent. So yesterday I marched across the snow to the hoop house and set to work. I am determined to get my early peas. I went in armed with a roll of chicken wire and digging tools. After stripping down to shorts and T-shirt because it’s hot in the hoop house when the sun is out, I got to work.

First I dug out the row where the peas should be, not one was left. I dug a much deeper trench that I would if I was just planting more peas.
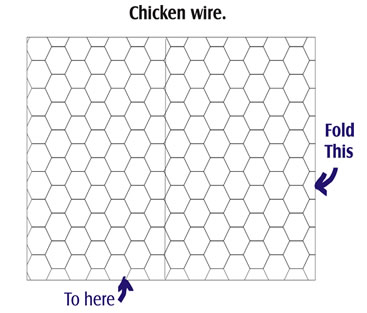
Then I cut the chicken wire to the length of the row. Next I bent the wire over double so that the holes of one side were overlapped by the folded side making the hole diameter half what it would be on normal chicken wire.

Diagram of chicken wire.
Diagram of chicken wire. Fold one edge about 2/3 way up a couple of hole past the central wire.

That done I bent the folded section in half and laid the wire in the trench I had dug.

after folding in half 2/3 way up. Then fold the already folded half in half again to make a V with a cap on it.
After folding in half 2/3 way up. Then fold the already folded half in half again to make a V with a cap on it.

Then filled the V shaped wire section with soil and planted the peas near the top. Finally I covered the seeds and folded the last third of the chicken wire over the top of the peas so they are now encased in a cage of chicken wire. I then wired the top in place so it won’t spring back up and expose the peas. I then added just a light covering over the whole chicken wire concoction.

Chicken wire in ground diagram.
End on diagram of chicken wire in the ground.

Then I did the same thing for the bean row. Finally it was all watered in and I stood back happily tired from my exertions.

Let the little buggers get through that lot to my seeds!

Now I just have to wait and see if it works. It should not bother the pea seeds their roots can easily get through the wire holes. While voles can be quite small I doubt that they can get through those small holes so my seeds should be safe. Now I just have to hope that the mice don’t come along and eat off the shoots when they emerge.

The hoop house is covered in white plastic not clear.  This is to stop the plants inside frying over the winter.  The plastic is there to stop the plant pots from freezing not to make them grow.  White plastic is also useful to ensure that the hoop house does not get too hot for other plants like cool season peas and beans.  Clear plastic would be much too hot and they seeds would most likely fry.  White plastic keeps is warmer but not enough to cook the plants inside.

Many Plants Grow Better When They Are Eaten.

Recently a friend forwarded me a link to a New York Times  article talking about how botanists have just discovered that some plant grow better when they are pruned or eaten by animals. Apparently this was totally unknown to science before this and botanists thought that any damage to plants was detrimental.

I was incredulous!

Where have these so called botanists been hiding? In the greenhouse and the laboratory? Obviously not out in the field where the plants grow. Anyone who has spent time outside knows that many plants grow better when they have been eaten or pruned.
Hundreds of ‘how to’ articles are written about as many plants that include phrases like ‘pinch out the tops to create bushing’ or ‘cut plant down to ground to encourage strong growth’.

Botanists don’t think this is damage?

Tulips browsed by deer. Regrowing and still producing flowers. Photo. Whitney Cranshaw, Colorado State University, Bugwood.org
Tulips browsed by deer. Regrowing and still producing flowers.
Photo. Whitney Cranshaw, Colorado State University, Bugwood.org

Anyone who has grown up in the countryside where there are grazing animals will have seen how many plants get stronger usually shorter and bushier when animals eat them. I grew up in rural England and I noticed this by the time I was six years old. Many plants, especially those you did not want like thistles grew stronger when the sheep and cows eat them. It was common knowledge everywhere. Now I live in the United States I see how many plants in our fields grow stronger and bushier after the deer have been through and eaten them off. Horseweed especially gets bushy and produces far more flowers than if left alone to grow tall and produce just one flower stalk. I just wish the deer would eat the plant to the ground rather than letting it grow into a bush. Top browsed plants are a lot stronger and much harder to pull out than the non eaten ones.

It is true that many plants don’t do well with browsing. These tend to be the ornamental plants that we bring home from the nursery. Ones that have been bred to have large flowers and no defenses. They are grown in our gardens which are not areas where they are native so they don’t know how to cope with the local herbivores.

Deer eaten Echinacea
This deer decimated Echinacea plant will regrow from the roots. It will flower later than its non eaten companions it will also be shorter and flower stems will also be short, but it may produce more flowers. These plants are resilient.

For most people this is never a problem since they put there plants into suburban gardens and they bloom wonderfully enhancing the landscape and making the garden beautiful. These plants never see a predator (large plant eating animal) so these plants are soft. Put the same plants in a rural area where there are deer or rabbits and they will get eaten to the ground and most likely not recover. They are not used to it. Some will come back stronger but not that many. If this is where the botanists have been concentrating their knowledge then of course they will think that plants don’t like being eaten. But like all scientists they should get outside the laboratory and look at the real world. Any farmer who has livestock will tell you that a lot of plants grow strong and bushy if eaten. Most often they are not ones that the farmer wants but they still know about them. It’s something you just learn, it does not take a degree to figure out, I suspect, like me, they see it from a very young age and just accept it as part of the plants life.

Many plants we grow also fall into this category. Often people prune shrubs and certainly herbs to make them bush out and produce more bulk. This includes a lot of herb plants. Most people know that if they cut down their basil or parsley plant it will grow back up again. Cut many plants to the ground and they will come back stronger. It’s common garden knowledge.

So how come the botanists think they have just discovered something? I guess it would never occur to them just to ask any keen gardener or a farmer.

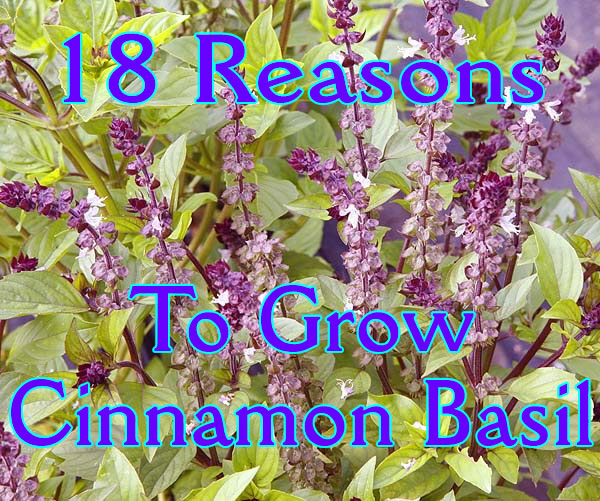
18 reasons to grow CINNAMON BASIL.

Ocimum basilicum ‘Cinnamon’

  1. It’s a really pretty plant. Even if you don’t want to eat it.
  2. It makes a wonderful ornamental
  3. Very easy to grow from seed
  4. The flowers are really pretty unlike other basils where the flowers can get spindly
  5. Has a lovely color. Bright green leaves with purple stems
  6. The flower stalks are dark burgundy and really contrast with the leaves
  7. Smells wonderful!!!!
  8. Tastes great, with a real cinnamon flavor
  9. The deer don’t eat it, unlike Genovese basil which they seem to like.
  10. Rabbits and woodchucks don’t eat it either.
  11. Can be harvested all season long and comes back strongly.
  12. Does not grow as tall as sweet basil, It’s more compact, does not get leggy if left untended.
  13. More bushy nature
  14. Can tolerate some shade and still produce great leaves and flowers
  15. Will stay producing leaves until killing frost, often tolerates light frost.
  16. Leaves can be frozen for later use. Just wrap in cling film and freeze
  17. Can be grown as an indoor pot plant. Needs bright window.
  18. Great for decks and hanging baskets.

Like all basils cinnamon basil does not refrigerate well. All basils tend to wilt and go brown when refrigerated so use immediately or freeze leaves for later use.

Detailed information about growing cinnamon basil

Cinnamon basil seeds.

Low Rainfall Means Less Mold, So It’s Bug Party Time!

What Do You Call An Insect Drunk Flyer?

Dangerous!

With higher temperatures across the northeast fruits and vegetables are ripening faster than normal. Insects are having a wonderful time and breeding yet another generation of bugs to plague the crops. Fruit that normally is insect free this year is, in some cases being infested with bugs and late growing maggots. So the crops are not harvestable. This is a problem for the farmer in several ways.

  1. He looses the crop, that means he has less money than expected this year.
  2. He can’t get the crop off the bushes it just has to stay there and rot for the most part paying workers to pick unmarketable fruit is a waste of money. There is no mechanical way to pick it so its going to just sit there.
  3. The dry weather means that the fruit is not rotting because mold only develops when there is some moisture. Fruit may have maggots but its not rotting.
  4. The absence of mold means that yeast can proliferate more. These will eat the crops and just like in beer they product alcohol. So the fruit is not rotting its fermenting!

Guess what? Insects like alcohol too! Fermenting fruit is a delight that is going to draw insects in for the party of the year. The hot weather can also cause the nectar in later blooming flowers to ferment too.

Yellowjackets/hornets and flies on fermenting plum.

Do bugs get drunk? They sure do. It can be fun to watch bugs drinking fermented nectar and then weaving off on a very wobbly flight path after leaving the flower or fruit. As a child I used to love watching the bees drink the fermented nectar from our Sedum flowers and then fly off all over the place. With other insects is harder to tell if they are drunk. How can you tell if an ant is drunk? I don’t know they weave around even when they are sober, but a lot of them can still bite.

Problem is that a drunk stinging insect is like a drunk driver, they don’t know what they are doing. They can crash into you and then get annoyed and sting for no reason. Drunk insects can be a real danger from the stinging perspective. Drunk bees are usually not too bad since when a bee stings it dies so even a drunk bee tends to be a little concerned but if she is very drunk then she might just sting without thinking about the consequences. (All forager bees are female).

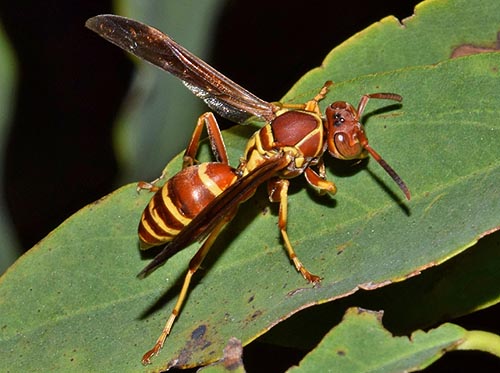
Paper wasp has a nasty sting and can sting repeatedly.

Drunk yellow jackets or hornets are a different matter. They can sting to their hearts content so drunk ones can be quite unpredictable and just sting because they feel like it. Non flying insects are not such a problem. They might run up your legs and bite you but its not as likely, unless you are near aggressive ants, but they wild do that drunk or sober.

Your best option is to stay away from areas where there is ripening fruit or plants that have lots of nectar at this time of year. Don’t let young children near these areas. Just like my mother would not let me close to our sedum plants when the nectar was fermenting don’t let children or pets near them now. Drunken insects can be nasty.

Will there be a rise in food prices because of the hurricanes?

This year has been disastrous for the US with Hurricane damage, first Texas, then Florida and then Puerto Rico. While almost everyone in the US is concerned about the people effected by these hurricanes many don’t realize just how much its might effect them too. Most of us have already seen a rise in gas prices because of the refineries in Texas but less noticeable, as yet, is the migrant worker effect.

Many jobs in agriculture are seasonal. Farmers only need workers during the growing and harvesting seasons so they employ migrant workers who come into the country especially to work these jobs and then go home in the winter months. These workers are essential to get almost all of our vegetable and fruit crops harvested and shipped to the supermarkets for everyone to buy. A large proportion of these workers come from either Mexico or Puerto Rico. Here in the northeast for the past few years a lot of the workers have been coming in from Puerto Rico. After the Hurricane disaster all these workers have gone home to help their families and be with loved ones. This is of course exactly what you would expect them to do. Other workers from Mexico have who have families in the Earthquake areas have also gone home to be with their families. This has left very few migrant workers for the remaining harvesting of vital fresh foods.

Farmers are now scrambling to find workers to help with the harvest of the remaining crops. The unusually warm weather which is also an influence of the hurricane has extended the season providing a longer growing period but also ripening crops a lot faster than would normally happen at this time of the year. Produce does not wait, farmers have to work to the plants schedule not the other way around. However with so few workers to do the harvesting much of these crops is being left in the fields. Many farmers are now considering that crops may have to be abandoned and ploughed under because there are no workers to bring the crops in. This may cause an increase in the price of fruits and vegetables since there will be less available on the market, its all rotting in the fields.

Will the price of vegetables rise because farmers cannot harvest crops?

Many may ask why use migrant workers rather than home grown Americans? Simple. It’s almost impossible to get home grown Americans to do the job. The migrants are the only ones willing to do harder physical labor which is very hard work outside in often unpleasant weather conditions for fairly low wages. Agricultural jobs do not pay high rates farmers cannot afford it because the profit margin on fresh produce is very low. Consumers will not pay very high prices for fruits and vegetables everyone wants low prices. Low prices translate into low wages to grow and harvest the crops. Ask almost any farmer they will tell you without migrant workers there will be no food in Americans supermarkets. This year the prices may be higher. If such devastating weather continues in the future its certain we will see a rise in prices.

Dealing With Japanese Stiltgrass.

A nasty invasive you dont want in your yard.

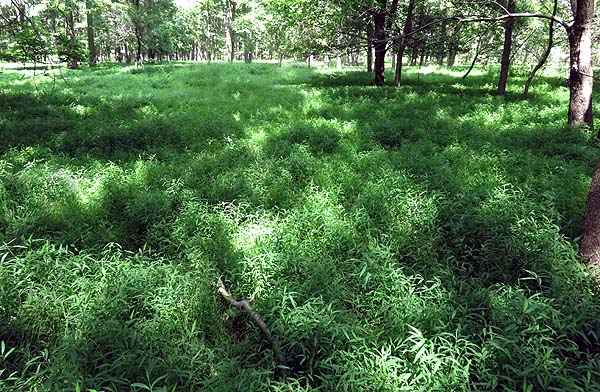
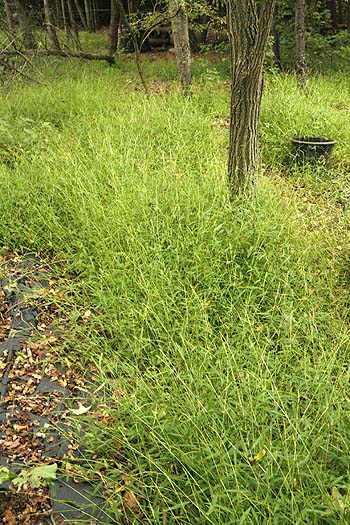
Japanese stiltgrass (Microstegium vimineum) is a nasty invasive plant that is taking over huge tracks of our countryside. It prefers semi shaded and shaded areas so it is has less other plants to deal with and is effortlessly replacing them all as the main woodland undergrowth. For those who dont know its dangers it looks pretty amazing. Walk through a woodland and you see all this lush green grass growing under the trees. The trouble is that is all you will see. There is absolutely nothing else growing there but Japanese stiltgrass. It takes over everything and smothers out all the native plants that should be growing in the woodland.

Japanese Stiltgrass has totally taken over this woodland.

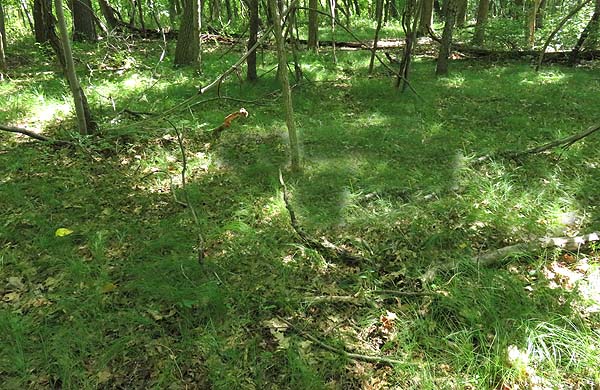
The other problem is that native animals, mainly deer, dont like to eat stiltgrass. They prefer the native species. So they will wade through the stiltgrass searching out the few remaining pieces of native vegetation and eating that. This is great for the stiltgrass since it ensures that any competition that it might have is removed and it has a free rain to take over without much chance of being eaten. Before long all our woodlands in the northeast will have nothing but stiltgrass as undergrowth.

Native grass woodland, what it should look like.

Stiltgrass will also invade lawns. This always happens from the shady edges under trees shrubs or at the edge of woodlands. Stiltgrass will begin to encroach on a lawn and can eventually take over these areas entirely. Stiltgrass is rarely a problem in full sun areas as it always prefers the shade.

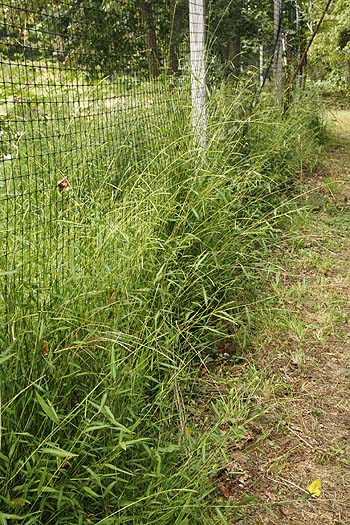
Stiltgrass is semi shaded woodland area.

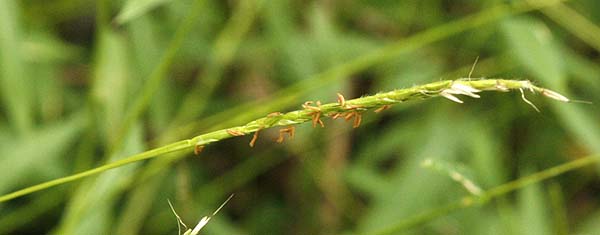
Stiltgrass is an annual plant. Think of it like a really invasive crabgrass. It flowers drops seed and then comes up again next year just like crabgrass. While crabgrass spreads out in a circle stiltgrass spreads by jumping It creates a long stem with a bend like an elbow joint in it. Where the elbow touches the ground new roots sprout and the grass moves across the ground. This is why its called stiltgrass. Left alone stiltgrass will grow to about 3feet in height but can reach 4 or more and produce an airy fluffy look that can be quite attractive. Often homeowners find the grass growing in their woodland areas, think its nice and are often happy that something is growing on the ground there. Its left alone and before long its marching out to take over the lawn, by that time its too late to control it.

Stiltgrass flower
Stiltgrass flower

Like crabgrass stiltgrass produces a lot of seeds, but they are pretty tiny and not as easy to see as crabgrass. One plant can produce as many as thousand seeds in a year. These seeds fall to the ground and can then remain viable there for five or more years. They are also pretty sticky they will attach to shoes, pet fur, and wild animals and are easily transported over fairly long distances to reach new areas to colonize. Seeds are produced around August in zone 7 (New Jersey), but can be earlier or later depending on your location.

Once in a good spot they will germinate in the early spring, about the same time as crabgrass. Like crabgrass stiltgrass seeds need light to germinate this is why they do so well in forests where there is usually quite a lot of bare ground during the springtime. It’s also why crabgrass cant do well on a healthy lawn. If the grass blades are close together the seeds can’t get to soil that light falls on and they can’t germinate.

Controlling stiltgrass is a lot more of a problem because it tends to come in from the shady parts of the lawn and from under the trees. Lawn grasses tend not to do as well in such areas and the grass is often spotty and there is more bare ground for the stiltgrass to germinate on. Once it takes hold it will smother out other grasses. Mowing the stiltgrass down only makes it strong and forces it to flower at a much shorter height. It does not remove the problem.

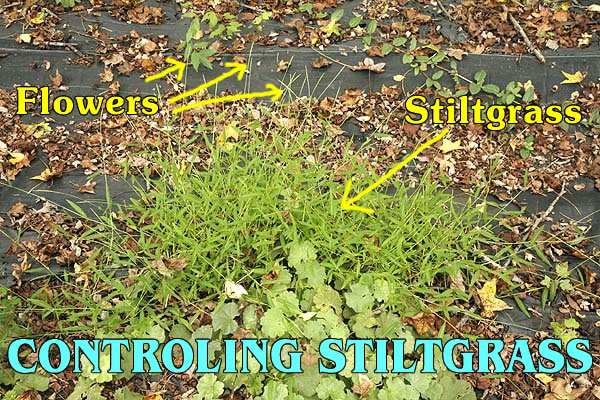
Controlling stiltgrass.
Its most likely going to be a never ending problem. Once you have a woodland area that is prone to stiltgrass unless you can find a ground cover for your woodland, then its going to get more stiltgrass coming in. If you live next to or near a wild area that has a stiltgrass infestation then you will most likely be battling stiltgrass forever. There is no known way to eradicate it.
There are however several techniques you can use to keep it out of your garden.

REMOVING STILTGRASS.

There are several options.
1. A pre emergent crabgrass killer can be applied to stop the seeds from germinating. The problem with this method is that nothing else will germinate either. If you are intending to plant the area with more mature plants or plug plants this method may work well. It will take some time and the pre emergent may have to be applied for several years to ensure that all the seeds are inhibited. It is also important that the area around is monitored if there is stiltgrass close to your location then it will re-infect the area constantly unless the ground is well covered with vegetation.

2. Hand pulling. Allow the stiltgrass to grow to a reasonable height then go through and hand pull. It is important that this be done before the plant has set seed. This method will need to be applied over several years to ensure that all the seed has been removed but eventually it will be eradicated provided it is not reintroduced from other areas.

3. Flame Weeding. A flame weeder can be used to burn off the plants when they are small. However if you chose to use this method there are several safety factors to consider.
a. All ground vegetation must be removed. Using a flame weeder amongst leaf or pine leaf litter will set the whole woodland on fire.
b. Use only when the stiltgrass is very small. Flame weeders do not work well on larger weeds they must be small. Using on a large plant again, may set the woodland on fire.
c. Always ensure you have a good supply of water with you to put out any fires before they start.

4. Weed killer. While many sources will suggest the use of weed killers its not the best option. The most common weed killer is roundup (Glyphosate). This material while effective at killing weeds is very toxic, it has been proven to cause cancer in humans and it not only kills the weeds that you put it on but kills everything in the soil that it is sprayed on. This basically sterilizes the soil making it very hard for any other plants to live there. It does not make for a healthy lawn, garden and especially not a healthy woodland.
While there are other weed killers available none seem to have much effect on stiltgrass.

HOW TO DEAL WITH STILTGRASS IN VARIOUS LOCATIONS.

In ideal locations Japanese Stiltgrass can reach four feet in height.

Shady areas and woodlands.
Controlling the stiltgrass in woodlands will take quite a lot of effort but it can be achieved.

If the stiltgrass has totally taken over the woodland its going to be hard to stop it. If there is just some stiltgrass then hand pulling each plant as it appears is the best option. If there is a large infestation then hand pull any plants that appear outside this to prevent it from spreading.

Procedure.
During the winter months when nothing is growing go into the woodland area and rake the ground. It is important to remove any dead branches, large twigs and leaf litter at this time so that the area can be worked in the summer months without danger of falling over obstacles that cannot be seen through the stiltgrass vegetation.

Remove the stiltgrass using one or more of the above options. Remember this may have to be repeated for several years before all the stiltgrass is eradicated.
In a woodland setting the important consideration is what to cover the ground with once the stiltgrass is gone. If the ground remains bare then the stiltgrass will take hold again. This can be quite difficult since a lot of native woodland plants tend to come up in the spring and then vanish once the leaf canopy unfolds and the light levels reduce. Stiltgrass does not so finding something that will grow at this time is not always easy especially if you want to keep your spring flowering natives.
Often this can be achieved with the use of native grasses, ferns or other material. See if you can find a native plant nursery in your area and talk to them about what plants would be best to us. Once your new plants are installed ensure that the area is constantly checked and any small stiltgrass plants are removed to ensure that a new infestation does not occur.

Shady Lawns.
If you have a lawn that is in a shady spot that is getting overrun with stiltgrass then you may have to consider removing the lawn. Most grasses, except stiltgrass, dont do well in shady areas. Its almost impossible to create the dense thick covering that is required to stop stiltgrass from germinating. The best option is to replace the grass with something else.

Short mown stiltgrass. It has still taken over this area and beaten out all other grasses.

You can try seeding the area with some other low growing plant or adding other plants to your lawn such as clover. While this will not give you the monoculture you might desire it will help to keep the ground covered and with clover it will also fix nitrogen that will help feed the lawn grass and make it stronger and thicker.

Remove the lawn entirely and replace it with a ground cover plant. Things like pacasandra work very well. It produces a dense canopy that the stiltgrass cannot penetrate and provides a low growing cover that will keep the stiltgrass at bay. If you dont like this plant they talk to your local garden center or nursery and see if they can suggest something else that will grow in your area.

Semi shaded lawns.
For areas that are on the edge of sunshine it may be possible to re-establish a good grass lawn. Provided that the shade area behind it has all the stiltgrass removed from it.
Mowing down the stiltgrass will not control it just cause it to set seed as a much lower height. The plants must be removed. Use one of the methods above to remove the stiltgrass. We tend to recommend the use of a flame weeder as being the best option. These can be purchase fairly inexpensively at Harbor Freight stores. Just take care when using one and ensure that there is no combustible material that can cause the garden to catch fire.

Ensure that you have a good grass seed that will grow in a semi shaded area. Work on and seed your grass in the fall NOT the spring. This will allow the grass seed to become established over the winter months are reduce the amount of bare ground that the stiltgrass has to grow on. In spring allow your grass in this are to grow slightly longer than normal to help shade the ground and to show up any stiltgrass plants that grow. Pull these out by hand. It may be tedious for the first few years as all the seeds germinate but eventually it will be eradicated.

Whatever method you choose to remove stiltgrass the main thing to remember is that this invasive is here to stay. If you dont want it in your garden they you will need to be vigilant. If it is here now then it will return from wherever those first seeds came from. Now you know what to look for you can walk around and spot the plants as they come up and quickly remove them. This is going to be an ongoing battle that will never end. You can never truly win but you can keep it under control.

29 REASONS TO GROW MOUNTAIN MINT.

Pycnanthemum virginianum

  1. Will grow almost anywhere.
  2. Produces lots of flowers later in the year than many other plants
  3. It’s a perennial, comes back every year.
  4. The bees and other pollinators love it
  5. Butterflies love it too
  6. It gives pollen and nectar at a time of the year when there is not a lot else for them to eat.
  7. Its edible.  Leaves taste like slightly mild peppermint
  8. Can be used instead of peppermint.
  9. Flowers are also edible and can be used to decorate salads,  desserts etc.
  10. It’s a native American plant
  11. Grows taller than regular mint, around four feet.
  12. Will take semi shade, but does like full sun.
  13. Flowers first year from seed.
  14. Flowers for long period of time (usually 1-2 months)
  15. Don’t need to water it
  16. It does not spread and take over like regular mint
  17. Stays fairly compact, plants increase in size over time.
  18. Does not need much maintenance once its established.  (Cut down when dies back in fall to make next year look smarter)
  19. Not fussy about soil type, will grow almost anywhere
  20. As long as the soil does not get waterlogged it will grow
  21. Hardy to zone 5, some reports say zone 4
  22. Deer don’t eat it
  23. Rabbits don’t eat it.
  24. Coyotes don’t eat it (they will decimate real peppermint)
  25. Will self seed but not very prolifically
  26. Great for back borders
  27. Great for areas where not a lot else grows.
  28. Good for meadows too
  29. Ideal for any garden.  Plant it , leave it and enjoy the flowers.

Detailed growing information and seeds.

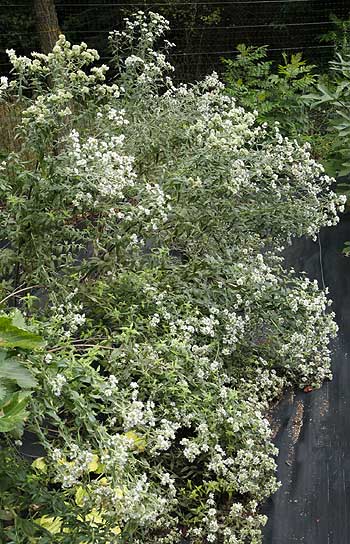
Cascade of flowering mountain mint plants (Pycnanthemum virginianum ) in our field.
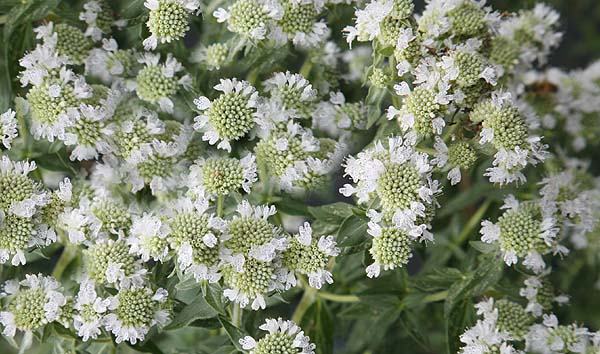
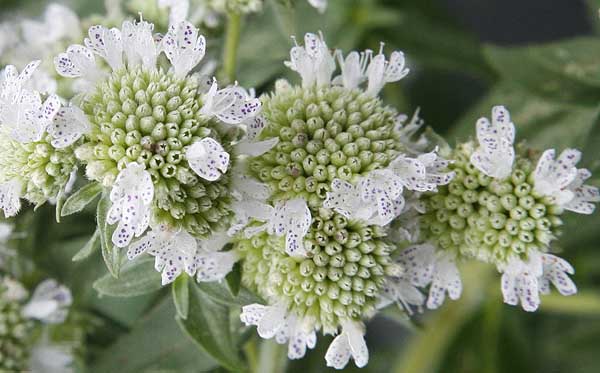
Close up Mountain Mint flowers (Pycnanthemum virginianum )