


STARTING A NEW GARDEN
A few major pointers for new gardeners.
Never made a garden before? Not sure what to do? Worried you might get
it wrong?
Don't worry its not that hard and if you kill a few plants along the way
then you learnt something. Think of gardening as a long experiment, you
learn as you go along, even experts are constantly learning and they kill
plants too. So don't worry if you do. Just adapt change the plan and try
something else.
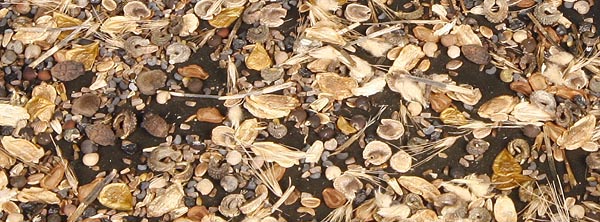
1. START YOUR PLANTS FROM SEED.
It's cheap and you get a lot of seeds for your money, you don't have to
grow them all at once so start a few if that does not go well then try
a few more. You can create a very diverse garden for little cost if you
use seeds. Grow more than you need so if you kill a few along the way
its not big deal. Buying plants can be expensive and if you do kill them
the investment is wasted and could be costly. Keep the seed packet in
the refrigerator so the seeds stay at their best until you need them.
2. GROW THINGS THAT ARE EASY.
Some plants are really easy to grow and will do well outside even without
a lot of help from you. Start with these if you can. Many herbs that are
going to be good for your health come into this category, they are tough
and easy to grow without a lot of help from you once they are started.
3. PROTECT THEM FROM WILDLIFE OR PETS.
If you are intending to grow vegetables or delicate plants they will need
protection. Nothing is more frustrating that getting your plants going
only to find them disappear from wildlife browsing or pets stomping on
them. Unless you live in the center of a city then its likely you will
get wildlife, even in suburbia rabbits can be a major problem along with
raccoons and small rodents so some kind of fence around your vegetable
garden will be needed.
Quite a lot of important medicinal herbs don't need protection, their aroma - which we may love - keeps wildlife away and not even deer browse on them. Such plants wont need any more effort on your part so if you are new to gardening this might be the place to start.
Adding a fence is fairly simple. You can purchase wire fencing from places
like home depot or lowes and have it delivered along with metal stakes
to keep your fence up. If you have rabbits and raccoons a low fence might
be enough, if you have deer then a tall more complex fence might be needed
to keep your plants protected.
Lowes have some really nice no dig fencing that looks quite decorative
and makes a great fence around any garden. We have used this for lots
of different projects.
4. DECIDE ON THE SIZE OF YOUR GARDEN BEFORE YOU PLANT YOUR SEEDS.
Its really easy to grow far more seeds than you need. Plants can grow
pretty big from just a few seeds so you wont need that many. If you have
never made a garden before don't get over zealous about it and plan for
something too large. Something about 10 feet by 10 feet - that twenty
square feet will be enough to begin with smaller may be better. Remember
you need to prepare the ground first, which is the tough bit so don't
get over enthusiastic.
5. IF POSSIBLE START YOUR SEEDS INDOORS.
Its really not hard to do and you will get better results for most plants
than trying to start outside. There are some exceptions, large seeds like
peas, beans sunflowers and anything in the squash/melon family are big
enough to start outside. But most other seeds are pretty small and they
will get taken over by weeds outside before they are large enough to become
proper plants. Determining which little seedling is your desired plant
and which is a weed can be difficult for beginners.
All you need is a south or west facing window something to put your plant trays on and a desire to grow something.
6. CONTAINERS TO PLANT YOUR SEEDS IN.
While its great to have proper seed trays and even better to have cell
trays (seed trays with individual cells one for each seed) seeds can be
grown in almost anything that will hold water and soil. Cut the bottoms
off gallon milk containers and use those it's a great resource. Use your
imagination. See our article on Making Seed Containers for some ideas.
Whatever you choose make sure it has holes in the bottom to drain the
water! Waterlogged seeds will die.
7. POTTING SOIL.
On this there really is no compromise you have to get some good potting
mix. While it might sound like a great idea to use soil from the garden
that's going to be full of weed seeds which is what we are trying to avoid
in the first place. So get yourself a bag of potting mix and use that,
its sterile and wont have all those nasty weed seeds. The expense is worth
it.
8. PLANT YOUR SEEDS.
Read our articles on How
to start seeds to get the best possible plants. For detailed instructions
on how to plant your seeds and look after them to begin with.
9. LOCATION FOR YOUR SEEDS.
As stated above a south or west facing window is ideal. Find a flat surface
that you can put next to the window at the height of the bottom of the
window or just above. If possible get some plastic sheeting or other waterproof
covering that is one continuous sheet to cover this with. Old plastic
table cloths provided they have not holes or rips are ideal. DO NOT use
a favored piece of furniture to put your seeds on just in case there is
any water leakage even with plastic covering. If you cant find a full
sheet may layers of plastic grocery bags will usually prevent water from
reaching the surface. Make the sheeting larger than the table surface
so you can curl up the edges and prevent any water from dropping onto
the floor.
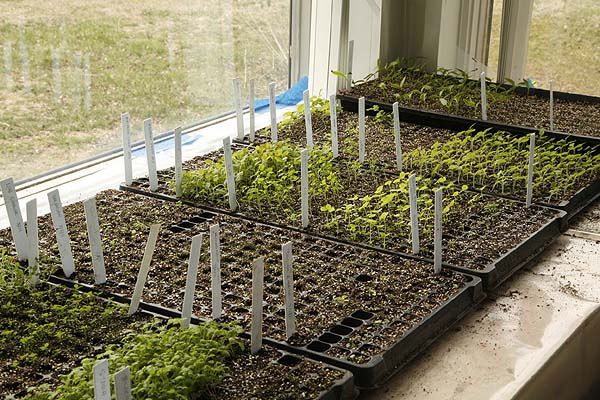
Seed trays in a west facing window
10. WARMTH.
Seeds need to be at warm temperatures to grow well so choose a location
that is warm. 60-70°F (15-21°C) is best. For many years our seeds
were started under artificial light in our office. It's the warmest room
in the house and easy to access even if it is frustrating having half
the office taken over by seed trays.
11. POT SEEDLINGS INTO LARGER CONTAINERS ONCE THEY GROW.
Again its ideal if you have some nice little pots that you can use to
pot on but its not necessary you can use any small container that holds
water that you can punch holes in the bottom to allow drainage. So all
plastic pots that hold food are good, glass jars are not since you cant
make holes in them. You can even use cardboard contains that held milk
or juice or even tin cans provided you can make holes in the bottom and
not cut yourself. Read our article on potting on for detailed instructions.
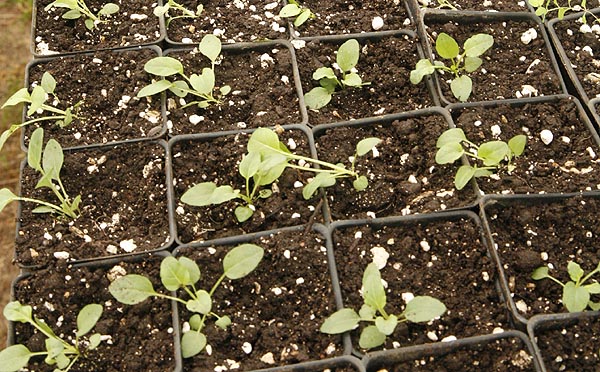
Larger seedlings transfered into individual pots
12. PLANTING OUT.
Finally once your seeds are large enough you can plant them outside in
the ground. After that the amount of time you will need to spend with
your new plants will depend on what seeds you have chosen to grow. Many
herb plants are pretty tough and don't need much extra help. Some vegetables
like peas, beans, okra and squash don't either, but most other veggies
are going to need a fair amount of attention. So decide how much time
you want to spend, but remember it gives you something to do and gets
you outside in the fresh air.
13. PREPARING THE GROUND.
Ok this is the hard part. Its going to take a little effort and time to
do especially if you don't have any experience in doing this before and
you will need some tools. A spade, fork and rake should do the trick in
most instances. See our list of tools you will need then read Preparing
The Ground For You New Garden. (coming this week)
14. ADDING YOUR PLANTS OR PLANTING SEEDS.
Unless you are planting peas, fava beans or potatoes do not plant out
until all danger of frost has past. Those listed here are cool weather
crops and for much of the country its already too late to plant them.
Colder zones can still manage but the window is starting to close so get
them in soon.
15. SPACING YOUR PLANTS.
When plants are small its easy not to realize how large they will get.
Planting too close together can cause crowding and lead to disease as
plants need airflow through their leaves to keep them healthy and prevent
molds and other critters from attacking them. Spacing at least 6 inches
apart, more for some plants is good. Don't put them too close it will
cause problems later.
16. YOUR NEW GARDEN IS IN!
Now you just need to take care of it. Taking Care Of Your New Garden.
(coming next week) Will give you some pointers on how to go about
this. Remember that gardens are always changing and that all gardening
is a learning experience. Even those who have gardened for years are still
learning. Don't be discouraged if your garden does not turn out the way
you intended that happens to everyone even the experts. If something does
not go well, learn from it, change, adapt and try again. Make notes so
you don't do the same thing next year. There are still seeds in that packet?
Then grow some more and try again. Think of gardening as an ever expanding
adventure just waiting for you to find it.
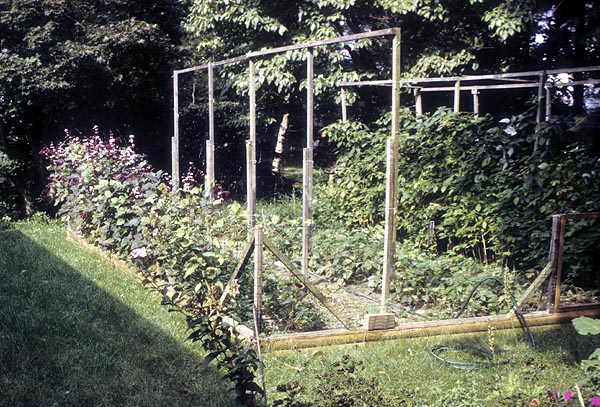
Small backyard vegetable garden
17. NEED EXTRA HELP?
Talk to your local master gardener network. Almost every state and within
that every county has a master gardening network. These people have gone
through training courses and now volunteer to help you with garden questions.
The don't come out to your garden but they will talk you through any problems
you have or now most have emails. Google "master gardener (your county
and state) hotline" this should point you to the page where you can
get the info to call for garden help local to you.
OTHER NEW GARDEN INFORMATION
How to start seeds to get the best possible plants.
Tools You Need To Make A Simple Garden.
How to Choose a Potting or Seeding Mix.
What Plants should I grow in my new Garden?.
Designing your garden for summer heat
Potting on your seedlings get get the best possible plants.
| Janice Hazeldine PhD is the owner and head grower of Floral Encounters an organic Medicinal Herb farm that is also a designated sanctuary for pollinators. |